Small homes, growing collections …. It is not always a case of budget, but rather space. ArtsHub takes a look at the history of the ‘salon hang’, and tips on how to do it right yourself.
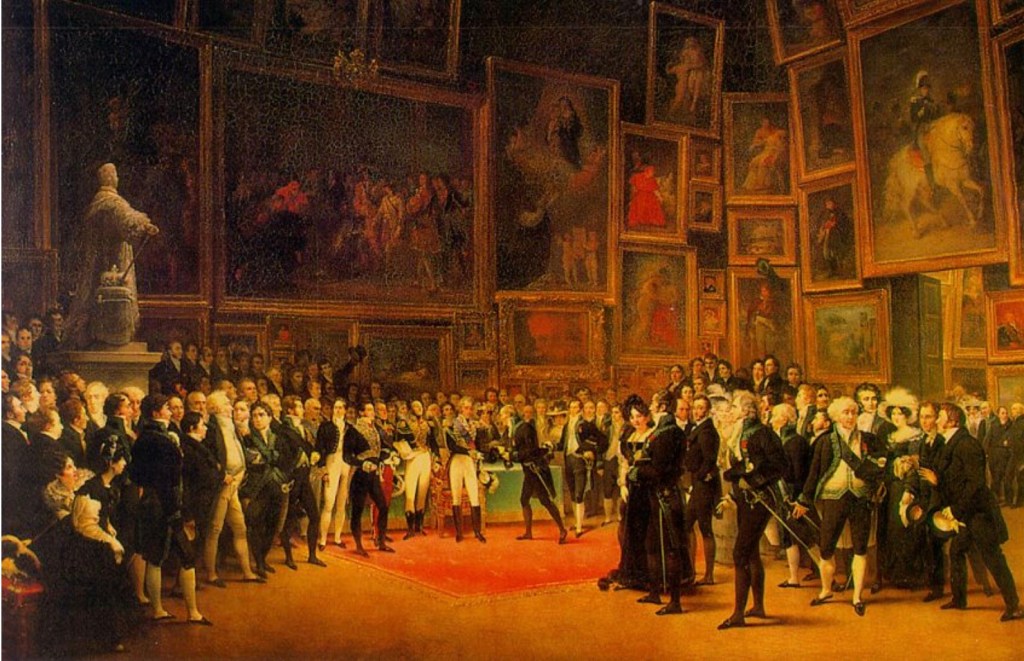
The ‘Salon-Style Hang’ is a method of displaying artworks in a stacked format – both horizontally and vertically. The style originated in the 1660s with the Royal Academy in Paris (the annual graduates exhibition of the Académie Royale de Peinture et de Sculpture). The first salon was held at Palace of the Louvre.
Because of the number of artworks presented each year, the walls were crammed from ceiling to floor in a mash up of genre and scales.
While the original salon was one very much controlled by the ruling classes of the day, today the salon hang is a popular decorating style used in both galleries and homes. Some have replaced the word ‘salon’ with ‘crowd’ to reflect the more democratic use in our times.
They are a great way to get artworks out of storage and onto the walls – and can be a real personal statement; this is an expression of you – you bought these pieces or collected these memories – now ‘out’ them, and enjoy them.
Regardless of the volume in your hang, getting it right is key – from the combination of artworks and objects, to the measuring and layout.
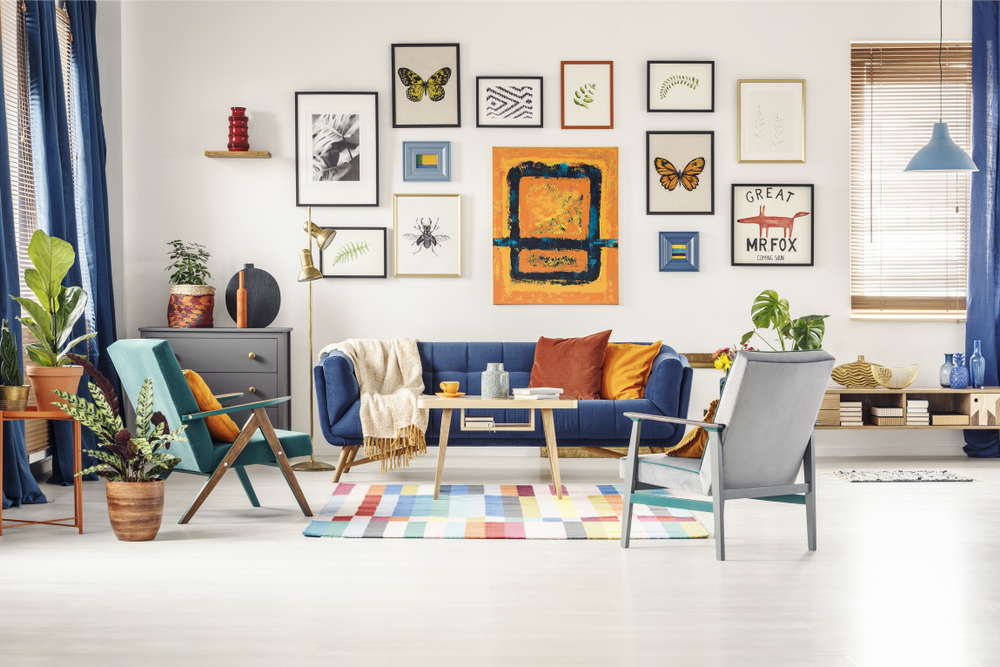
The salon hang is a great device for filling that zone over a couch, up a stair, down a hall, on a curved wall – or basically, to show all those smaller works that perhaps fit your price point better, but look lost on a wall alone.
How to create the perfect Salon hang
Find the right wall
How much space do you need to fill? First, you need to consider what is containing the zone – is it capped by the length of a couch, bed, or a nook under a staircase? And secondly, where you’d like your eyes to lead to, such as a journey up a stair, or to pull the outside in.
Salon hangs can be busy to the eye, so you need to consider what else is happening around it, and to allow space around the individual pieces to allow them to breathe, and still hold their own.
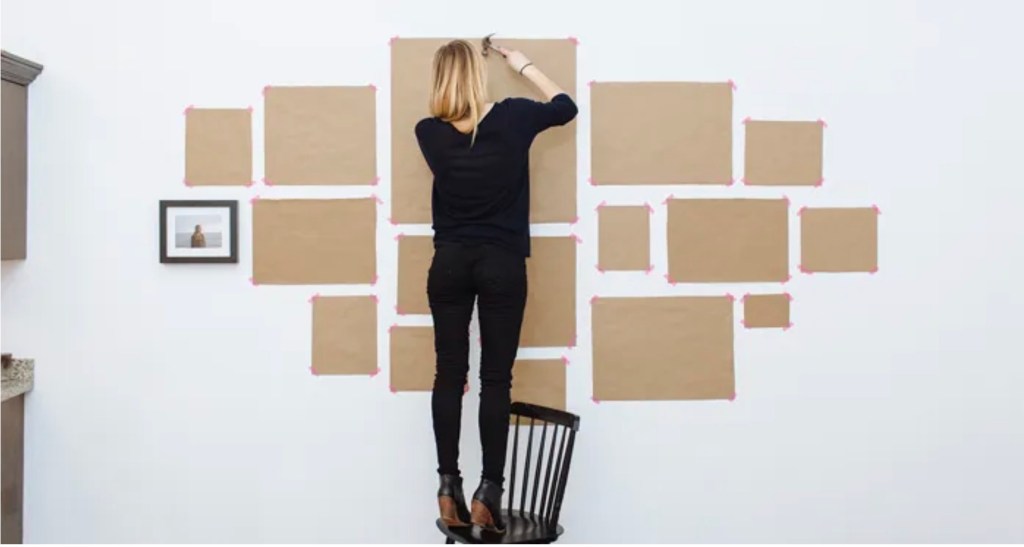
Start on the floor, not the wall
Do you like jigsaw puzzles? Just like starting the border first with a puzzle, you want to map out your salon hang to allow you to visualise the group before you pick up a hammer.
First measure out the zone and then on the floor tape out that working field.
The next consideration is whether you want a formal grid or freeform flowing group (which is a more traditional salon hang). It doesn’t have to be symmetrical; often asymmetry is what you are aiming for – either way, ensure there is balance across the group – think of it more like a rhythm or flow like a song.
Try to avoid one central work, unless it is key to the grouping. The nice thing about salon hangs is that they are often unexpected, so riff off that. Either way, you will need to have a focal point – often this is finding the right spot for the largest work, or the most colourful or complex pieces, and then build around, and out from it.
Avoid putting too much space between your chosen pieces. The aim of a salon hang is for individual works to be enjoyed together, so the best effect is achieved by hanging works in close proximity. A recommendation is around 3-5 centimetres between frames.
Don’t be afraid to mix it up – add a photo or a small wall mounted object, a neon or child’s drawing.
If you’re after a ‘heavier’ hang with a mix up of modern and traditional, consider distributing ornate frames with simpler ones so as to not crowd the wall. This way the eye can connect across those frames, helping to tie the group together.
Framing can be costly. Why not consider reclaimed framed to emphasise the eclectic nature of your works?
Think also of threads of colour and ideas across the artworks, and the play of scale to fit into the space you are using.
Too many colours?
You need to decide early if you are sticking to a colour range – just black and white photographs, earthy tones, or are all the frames the same to create consistency? For example, colour photographs can come together when all have black frames.
Colour can be used more subtly, such as artworks that all have a punch of green in them, uniting the collection, especially when placed in a busy room or hallway, or connecting with a leafy or ocean view.
Paper map
Even the most seasoned curators will map out the hang of an exhibition, digitally. This is just the same. Once you have your arrangement sorted – especially when a large number of works are involved – then create a paper ‘holder’ for each work. Label it with the outer frame dimension and what it is. Newspaper is a cheap way to do this.
Keeping the artworks in the arrangement (to refer back to for spacing), blue tack your paper map to the wall. Trust your eye now. Is it too congested … not enough works …did you get the spacing right? Make any adjustments and then reflect back to your grid of artworks.
You can leave your paper map in place, and one by one, replace with the artworks as you hang them.
Hang with precision
Most galleries prefer to use D-rings, which means the artworks sit flat on the wall (and don’t tilt forward on a wire). Artworks hung with a single hook on a wire will shuffle and move with time, thanks to the vibration of foot traffic – and nothing looks worse than a wobbly salon hang; D-rings hold the works firmly in place.
Measure each side of the frame, and attach the D-ring at the exact same distance from the top of the frame down. It is a good idea to do this first to all artworks before you start hanging. Another good tip is to use the same distance across all works, so when you are measuring up you are less likely to get confused by ‘the numbers’.
Start with hanging that anchor work first. Use a spirit level and mark the wall with pencil before you drill any holes. You want to measure that top level of the frame, then measure down each side the distance to your D-ring. That is your drill point. If the work has some weight to it, you may need to plug the hole for added strength so it doesn’t pull down on the plaster.
Hang – repeat – hang – repeat…